Quick Start Guide
Get your first MCP bundle working with ChatGPT, Claude, Cursor, or any MCP-compatible AI in just a few minutes.
Time to complete: 5–10 minutes
What You'll Accomplish
By the end of this guide, you'll have:
- A bundle enabled on your account
- Provider credentials connected, verified, and working
- Bundle showing "Ready - Credentials valid" status
- Bundle connected to your AI assistant
- Successfully called a tool from your AI
What is MCP? (60 seconds)
MCP (Model Context Protocol) is a standard that lets AI tools discover and call external capabilities.
Instead of your AI being limited to what it was trained on, MCP lets it:
- Access real-time data from APIs
- Perform actions in external services
- Extend its capabilities dynamically
A "bundle" is one MCP URL that exposes multiple related tools. Add the URL to your AI, and all the tools in that bundle become available.
Example: A "Marketing Automation" bundle might give your AI tools to list email campaigns, check replies, generate copy, and create contacts—all from one URL.
Prerequisites
Before starting:
- An MCPBundles account (Sign up free)
- An AI tool that supports MCP (ChatGPT, Claude, Cursor, VS Code, etc.)
- Credentials for any providers the bundle uses (API keys or OAuth)
Step 1: Choose or Create a Bundle
Option A: Use an Existing Bundle
- Go to Dashboard → Bundles
- Browse bundles by category (Marketing, Development, Analytics, etc.)
- Find one that fits your needs
- Click on it to view details
- Click "Add to My Account"
The bundle is now enabled but might show "Needs Credentials" if it requires providers you haven't connected yet.
Option B: Create Your Own Bundle
- Go to Dashboard → Bundles
- Click "Create Bundle"
- Enter:
- Name: Descriptive (e.g., "My Marketing Tools")
- Description: What it does
- Category: Pick the closest match
- Click "Create"
- Click "Add Tool" to add tools to your bundle
- When done, click "Publish"
- Click "Add to My Account" to enable it
New to bundles? See Understanding Bundles for details on how they work.
Step 2: Configure Provider Credentials
Most bundles require credentials to access external APIs (Smartlead, GitHub, Slack, etc.). You'll add and verify these credentials directly from your bundle page in just a few clicks.
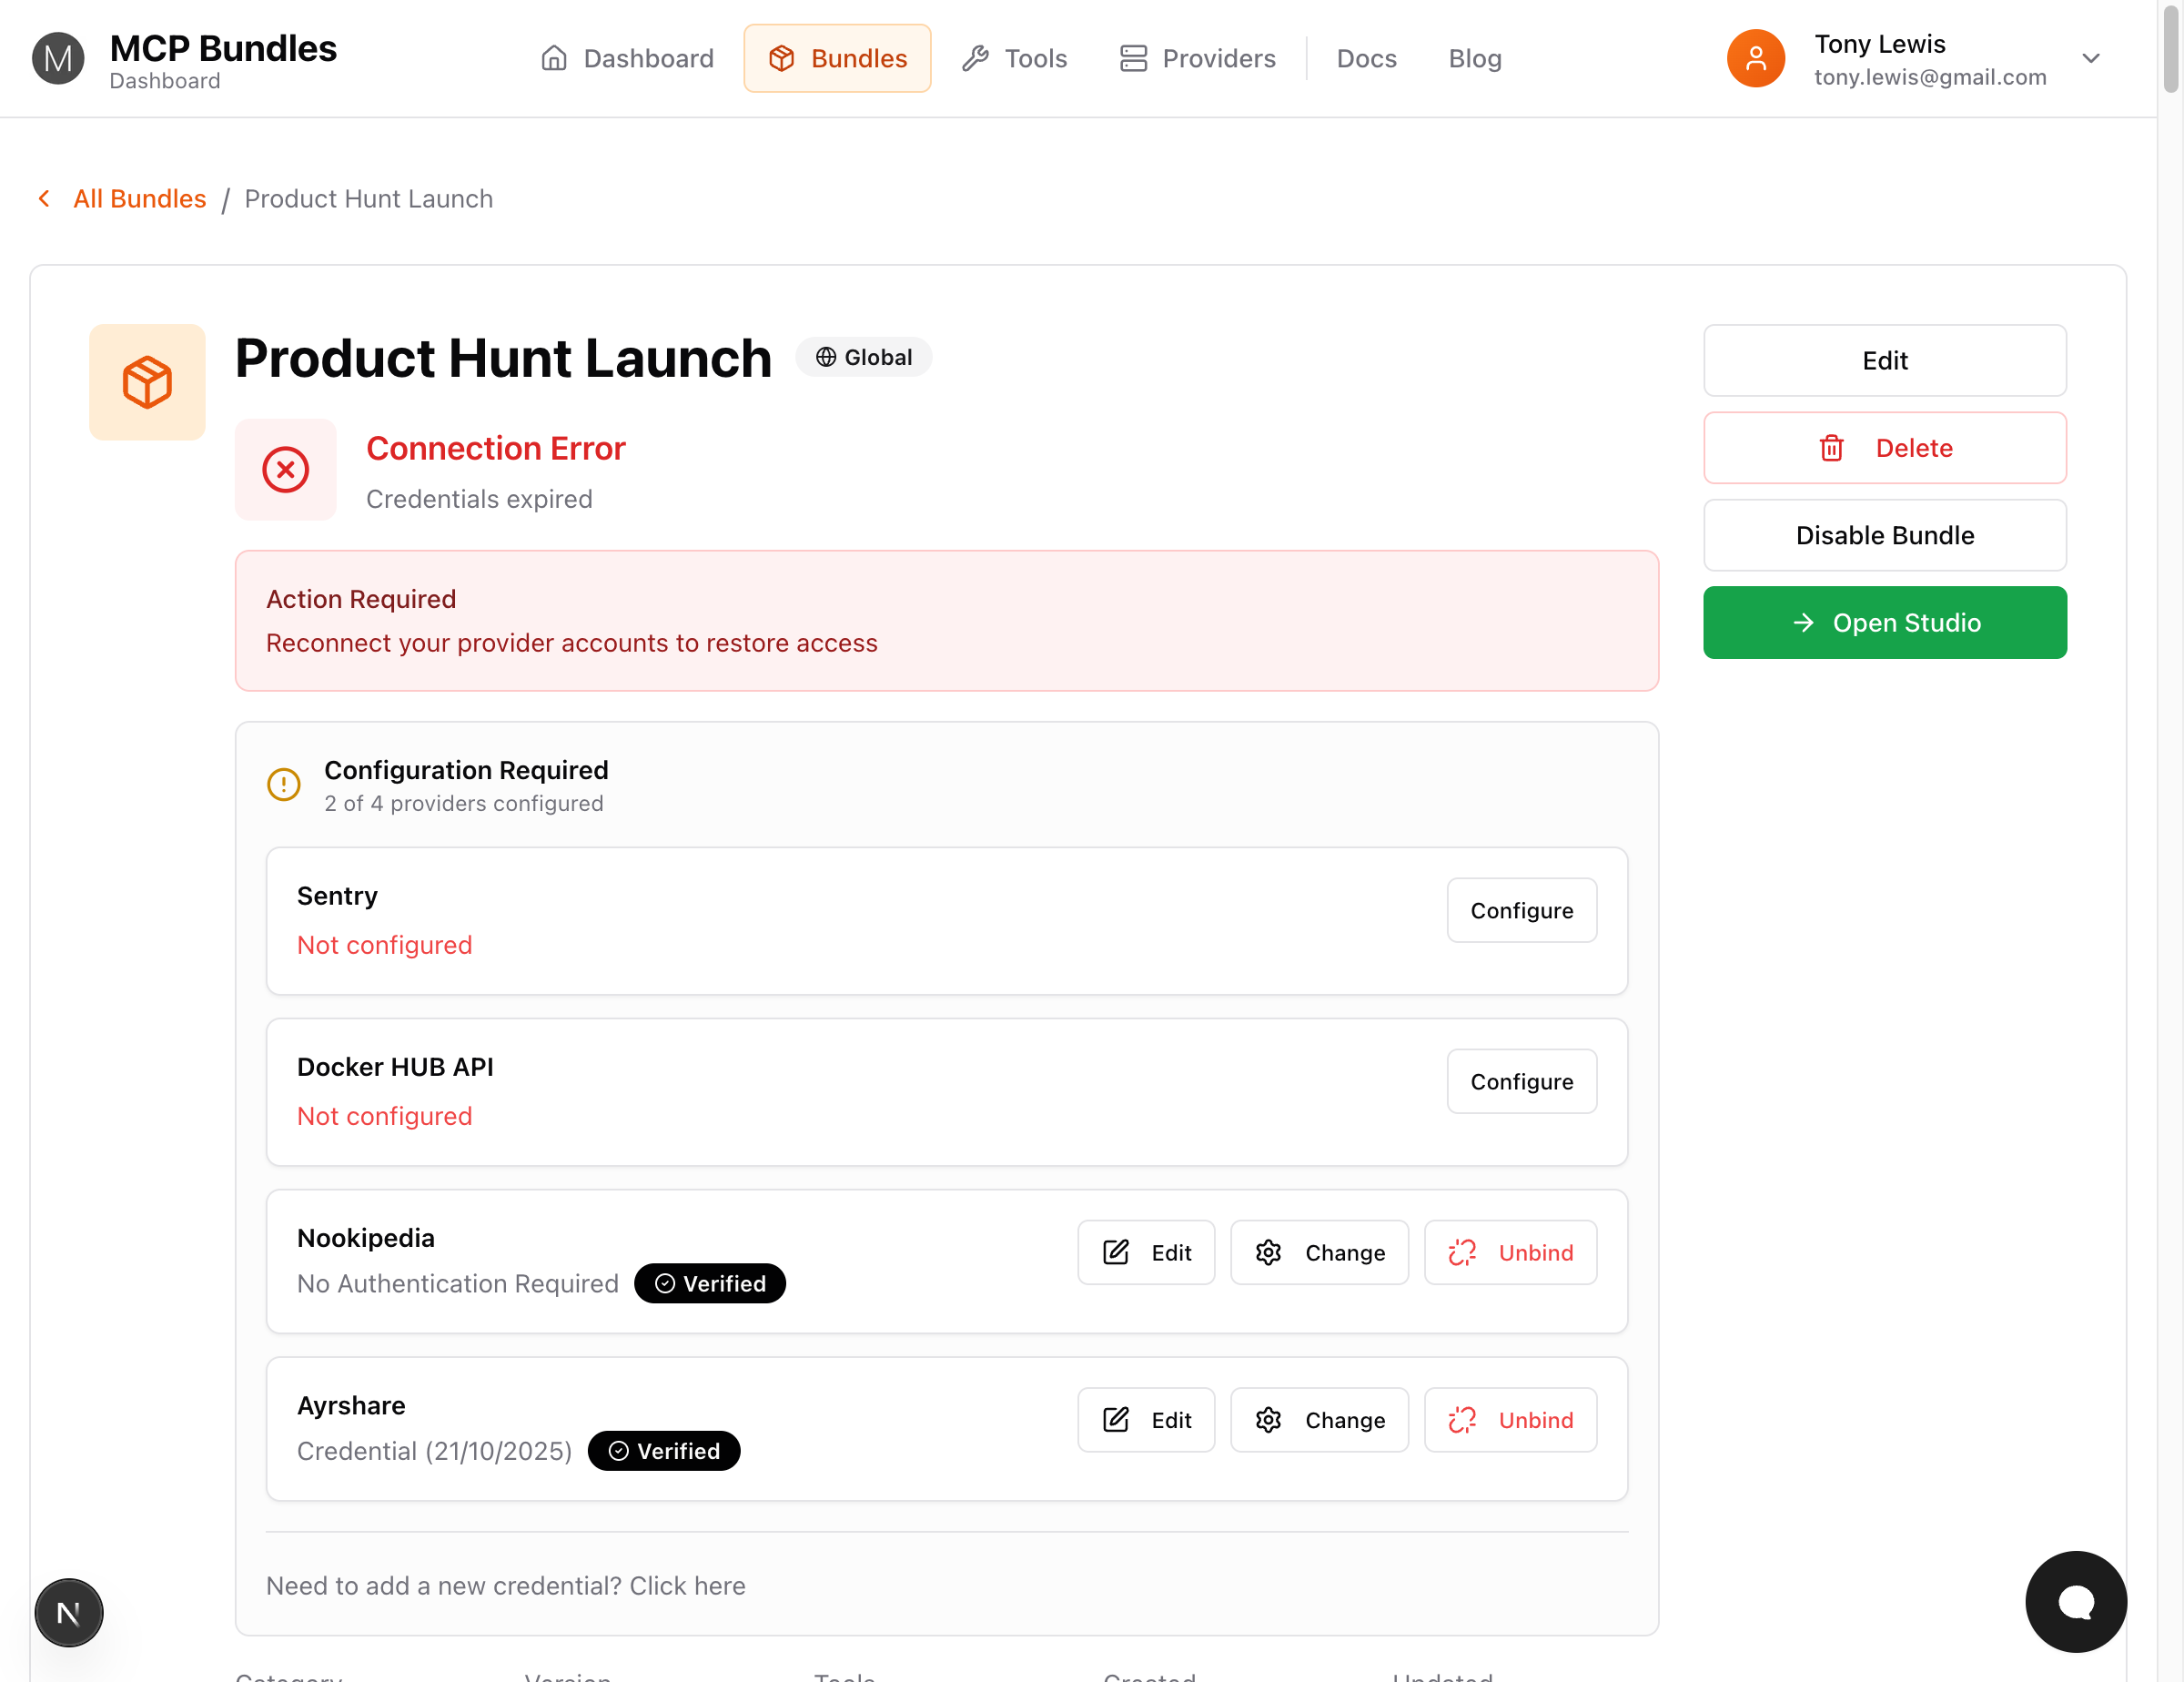
Check What's Needed
- On your bundle page, look for the "Configuration Required" section
- You'll see a list of providers with their status:
- "Not configured" (red text) = Needs credentials
- "Verified" (green badge) = Ready to use
- If you see "Connection Error" at the top, some credentials need attention
Adding Credentials
When you see a provider marked as "Not configured":
- Click the "Configure" button next to the provider
- A dialog opens showing available credentials (if you have any)
- Click "+ Add New Credential" to create a new one
- A panel slides in from the right side of your screen
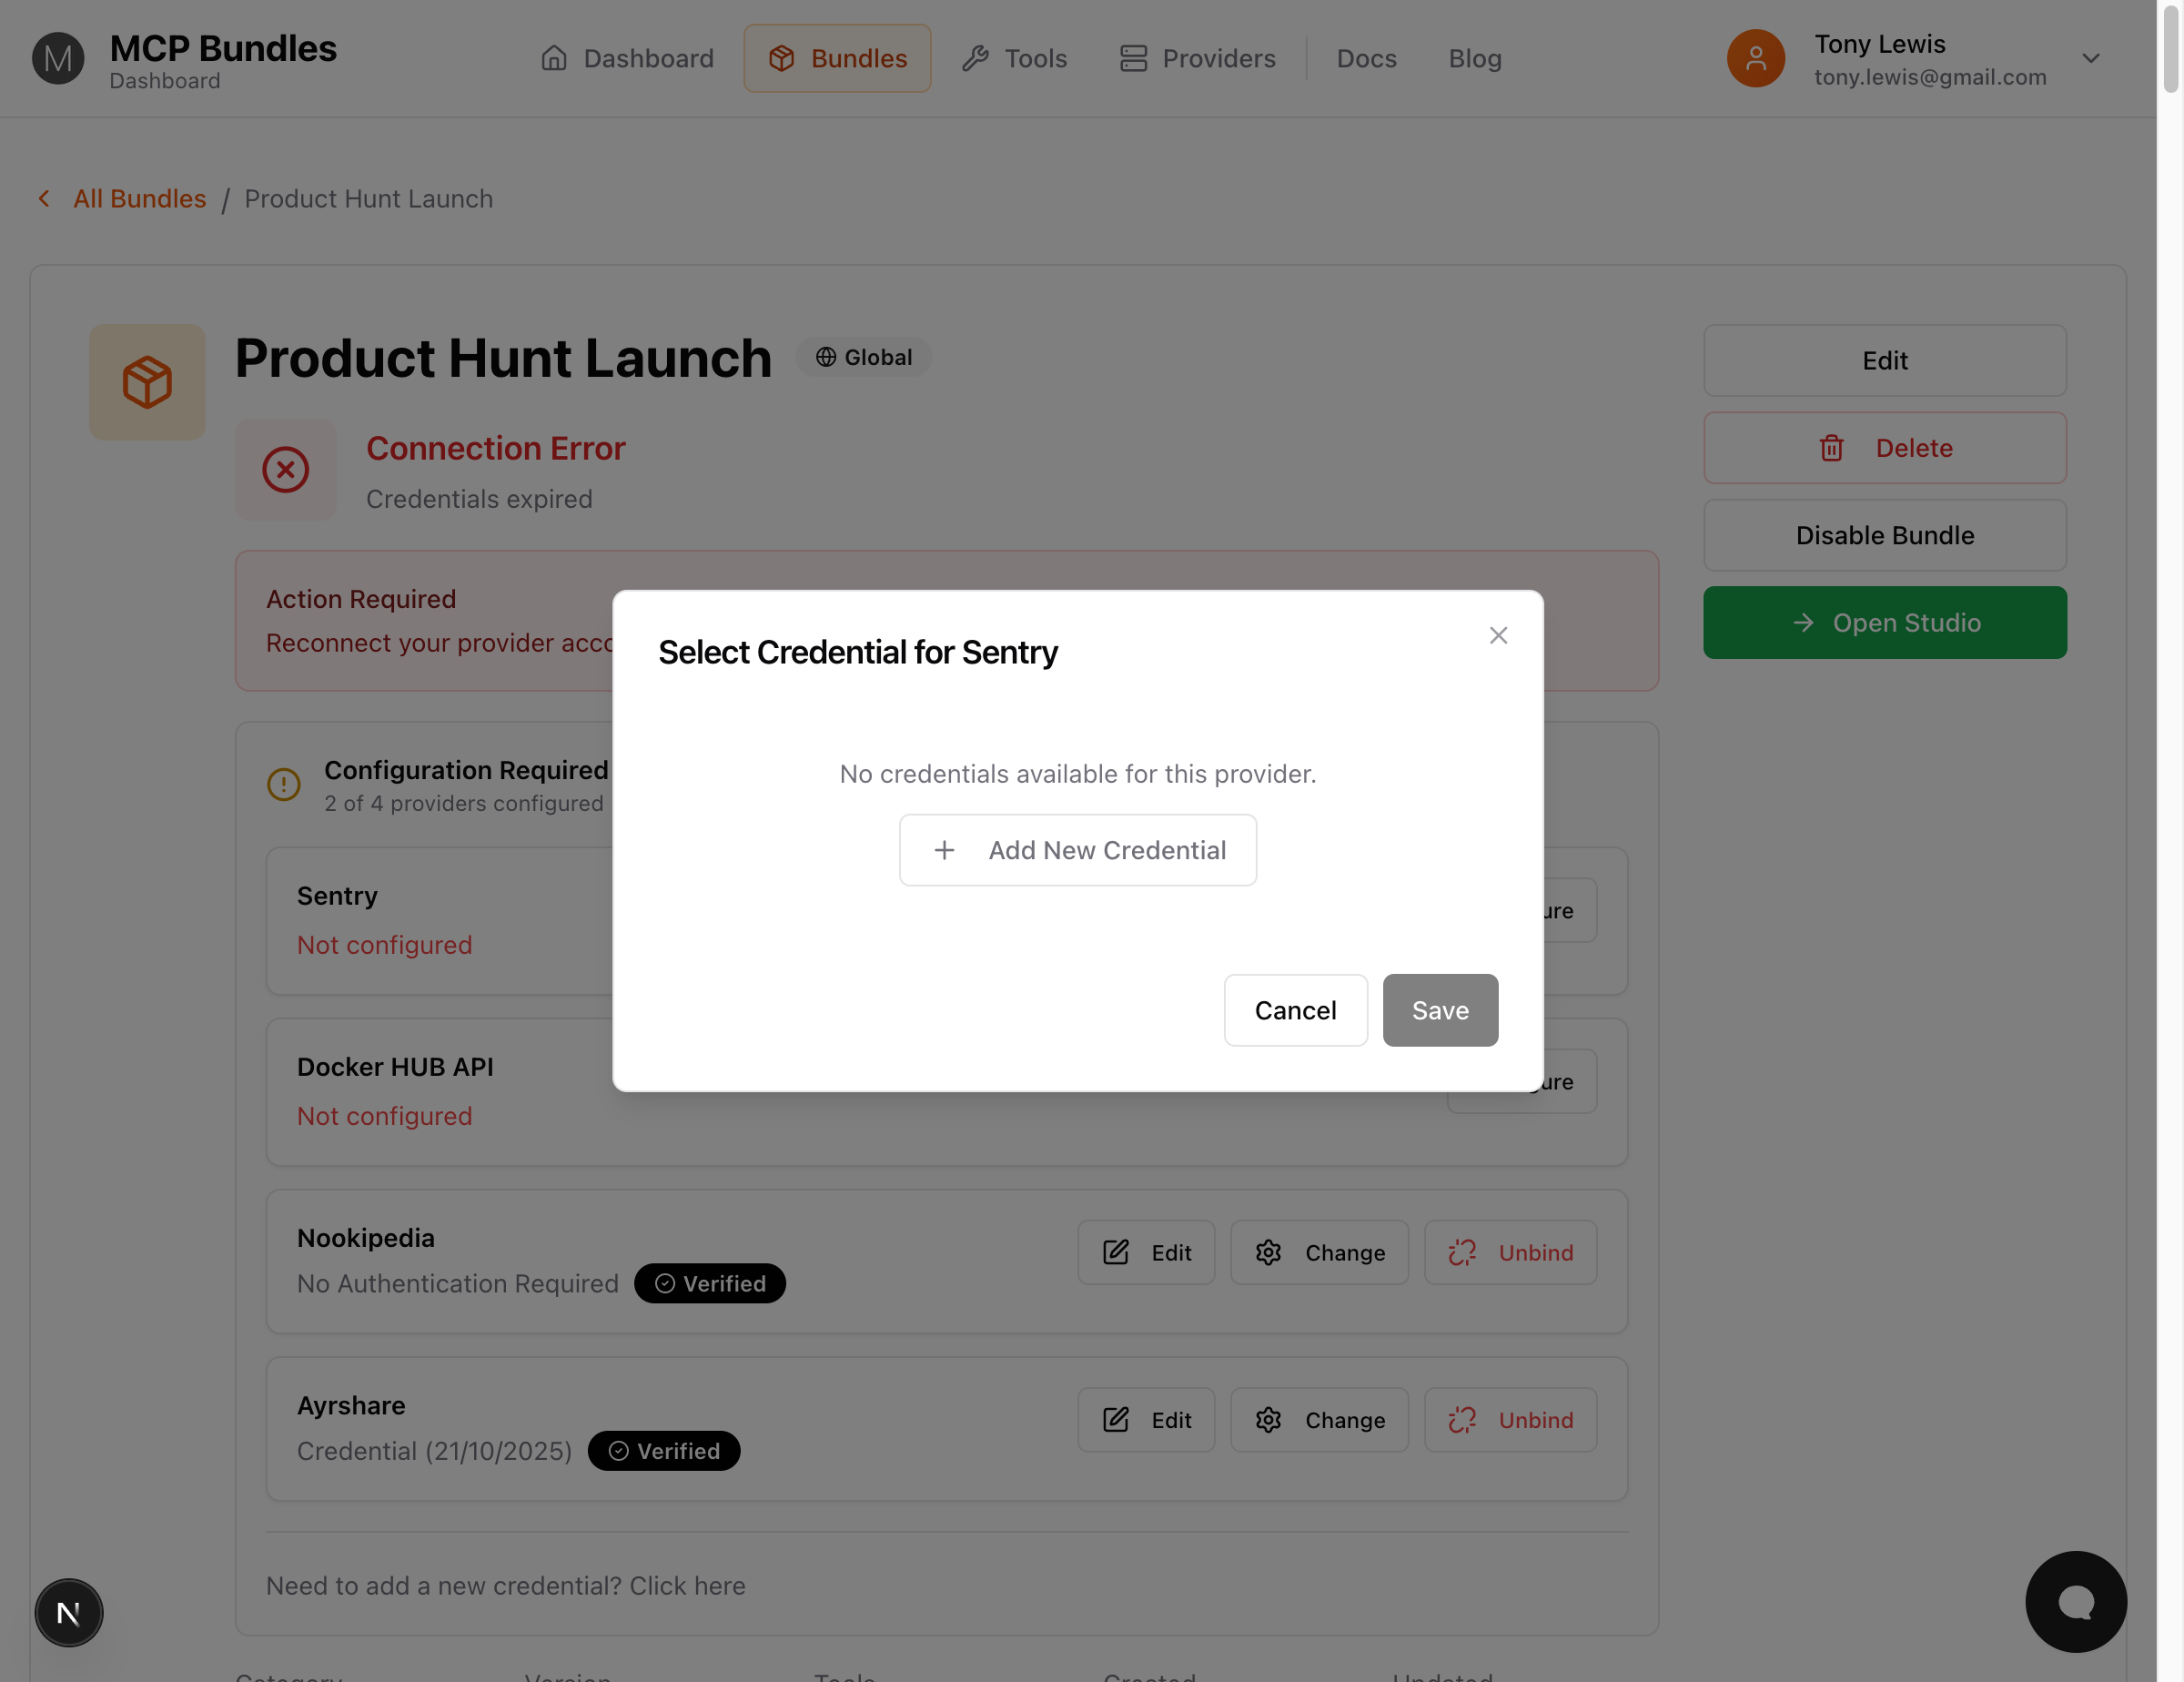
Important: The credential panel stays open throughout the entire process - you won't lose your place!
For OAuth Providers (GitHub, Slack, Sentry, etc.)
Once the credential panel opens:
- Enter an optional credential name (e.g., "Production Account", "Work Slack")
- Click the large blue "Connect with [Provider]" button
- OAuth window opens → Log in to the provider
- Review and approve the requested permissions
- OAuth window closes → You automatically return to the credential panel
- Validation tool picker automatically opens 🎉
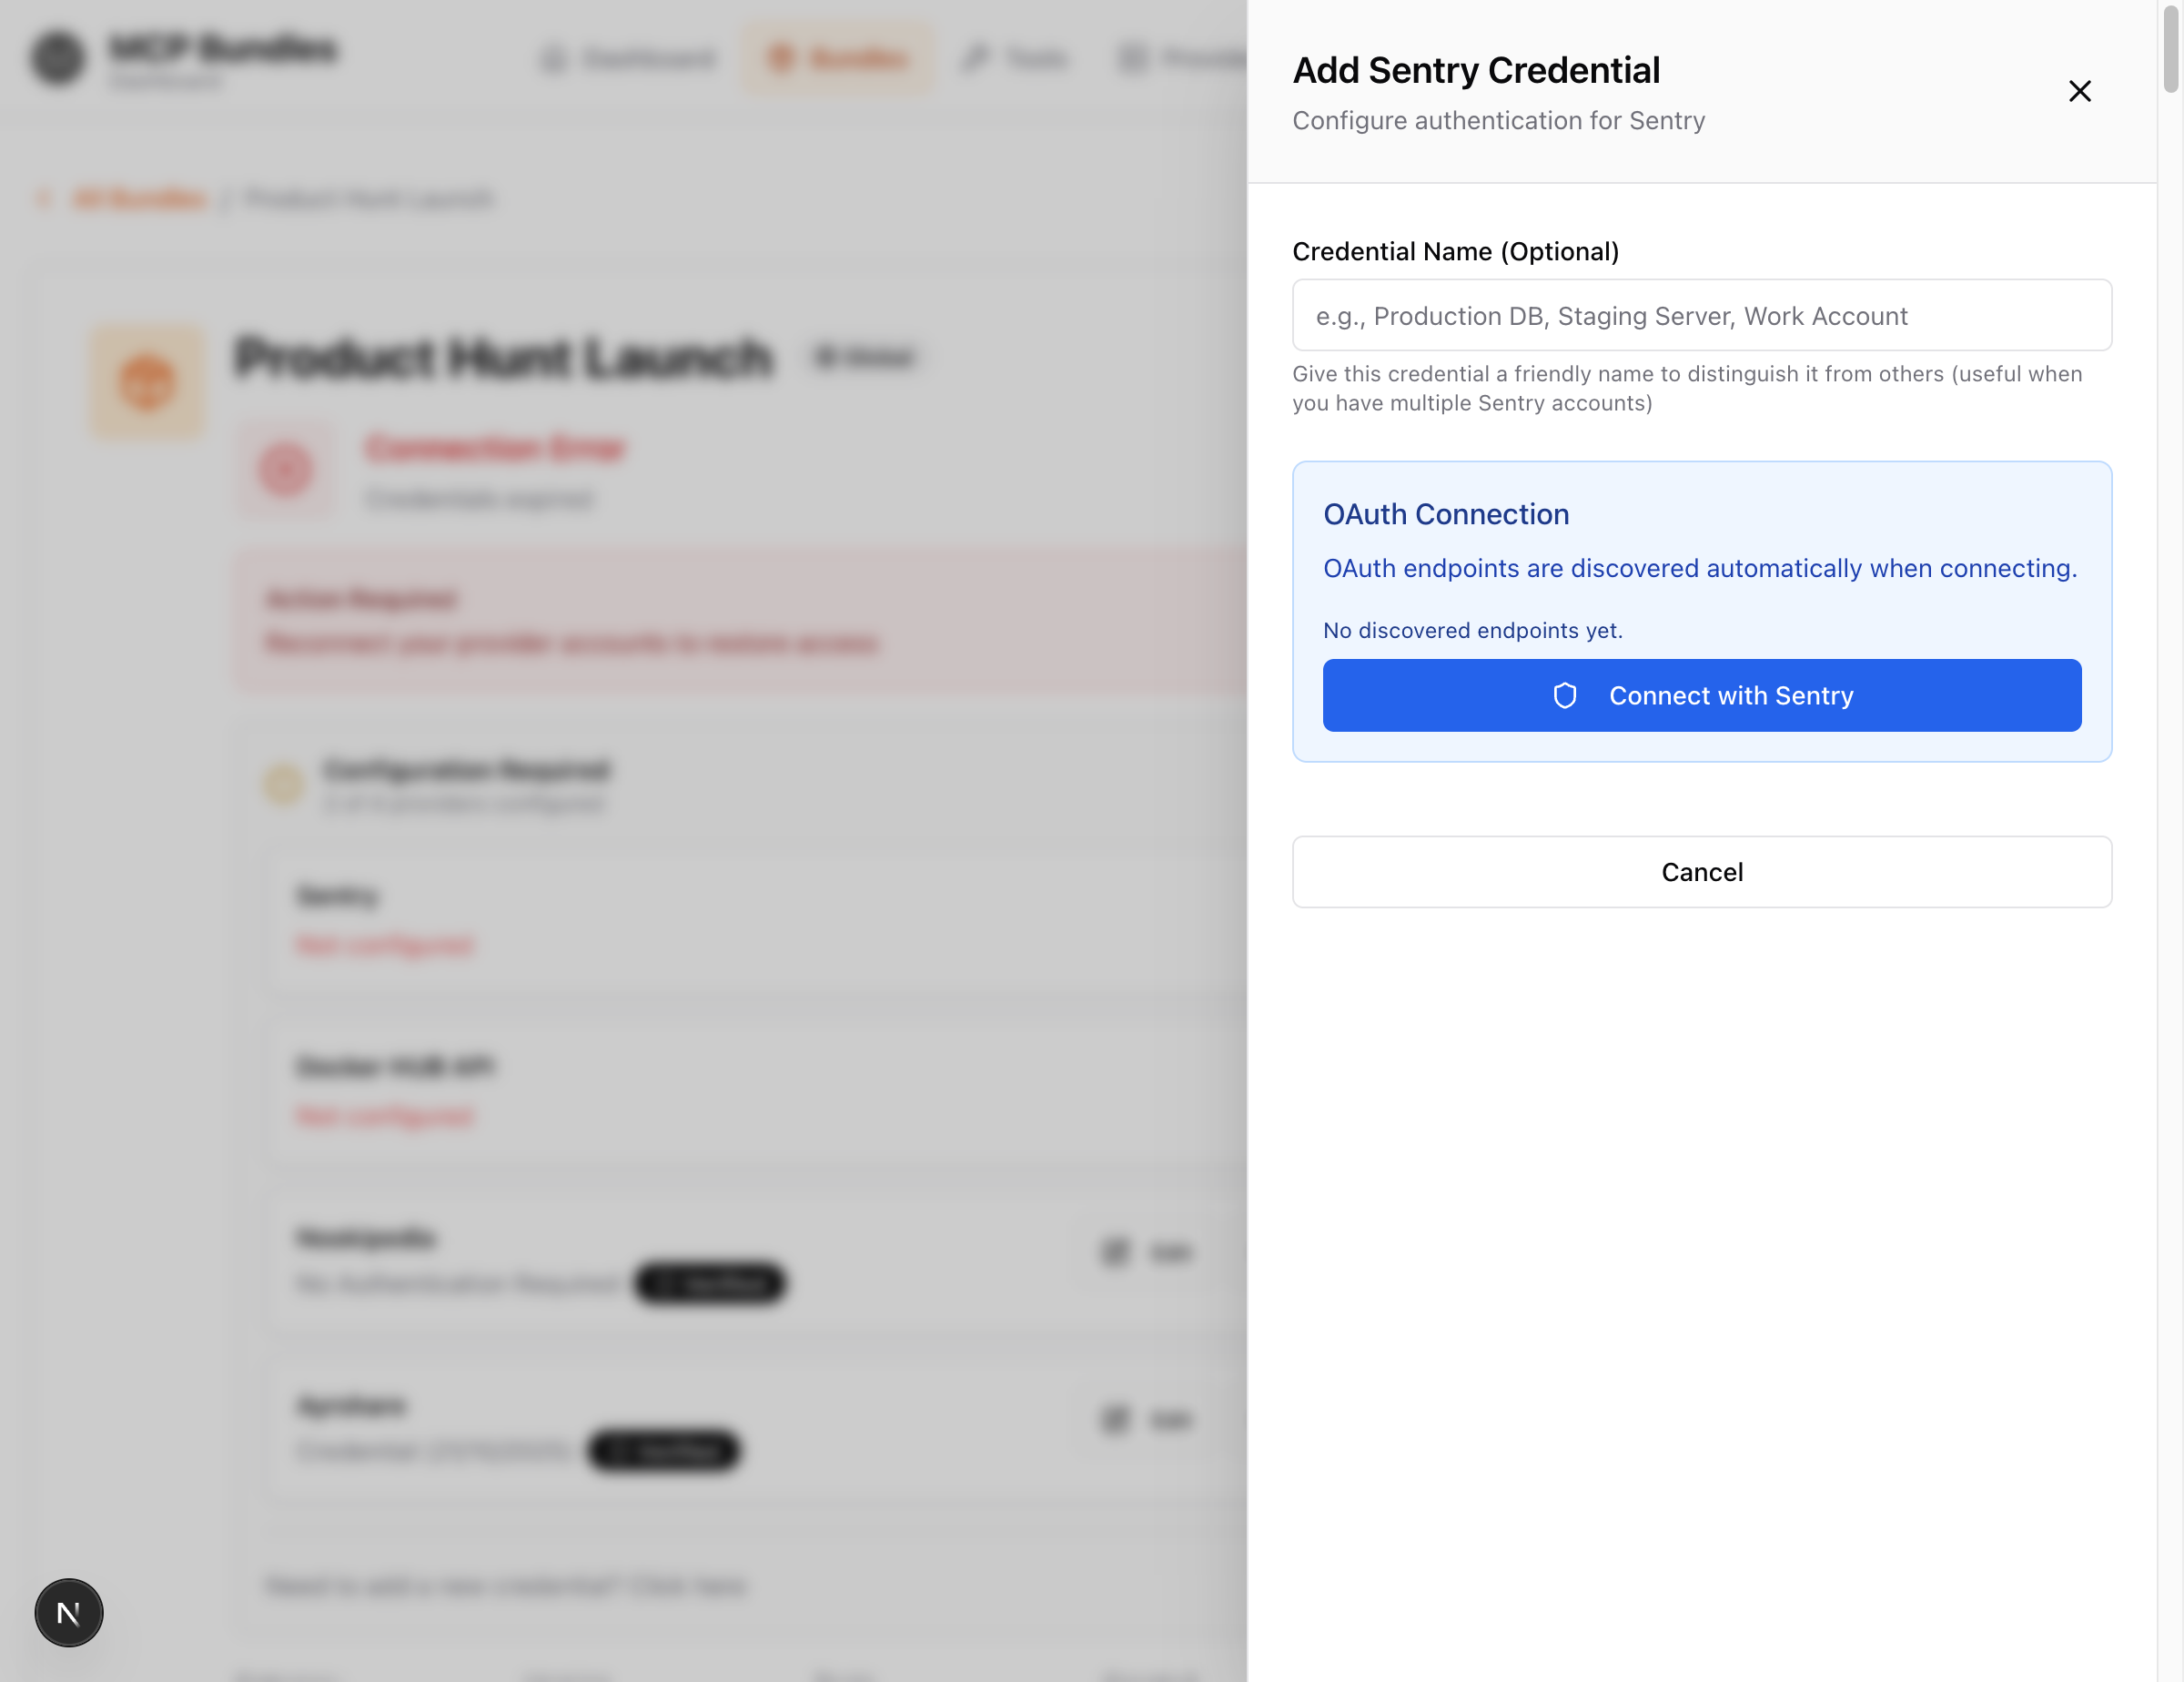
The credential panel reopens automatically - no need to navigate back!
For API Key Providers (Smartlead, OpenAI, etc.)
Once the credential panel opens:
- Get your API key from the provider's website (usually in Settings → API Keys)
- Paste the API key into the credential panel
- (Optional) Enter a credential name
- Click "Create Credential"
- ✅ Credential saved successfully!
Now you can optionally select a validation tool to test it.
Choose a Validation Tool
After adding your credential (OAuth or API key), you'll see a validation tool picker:
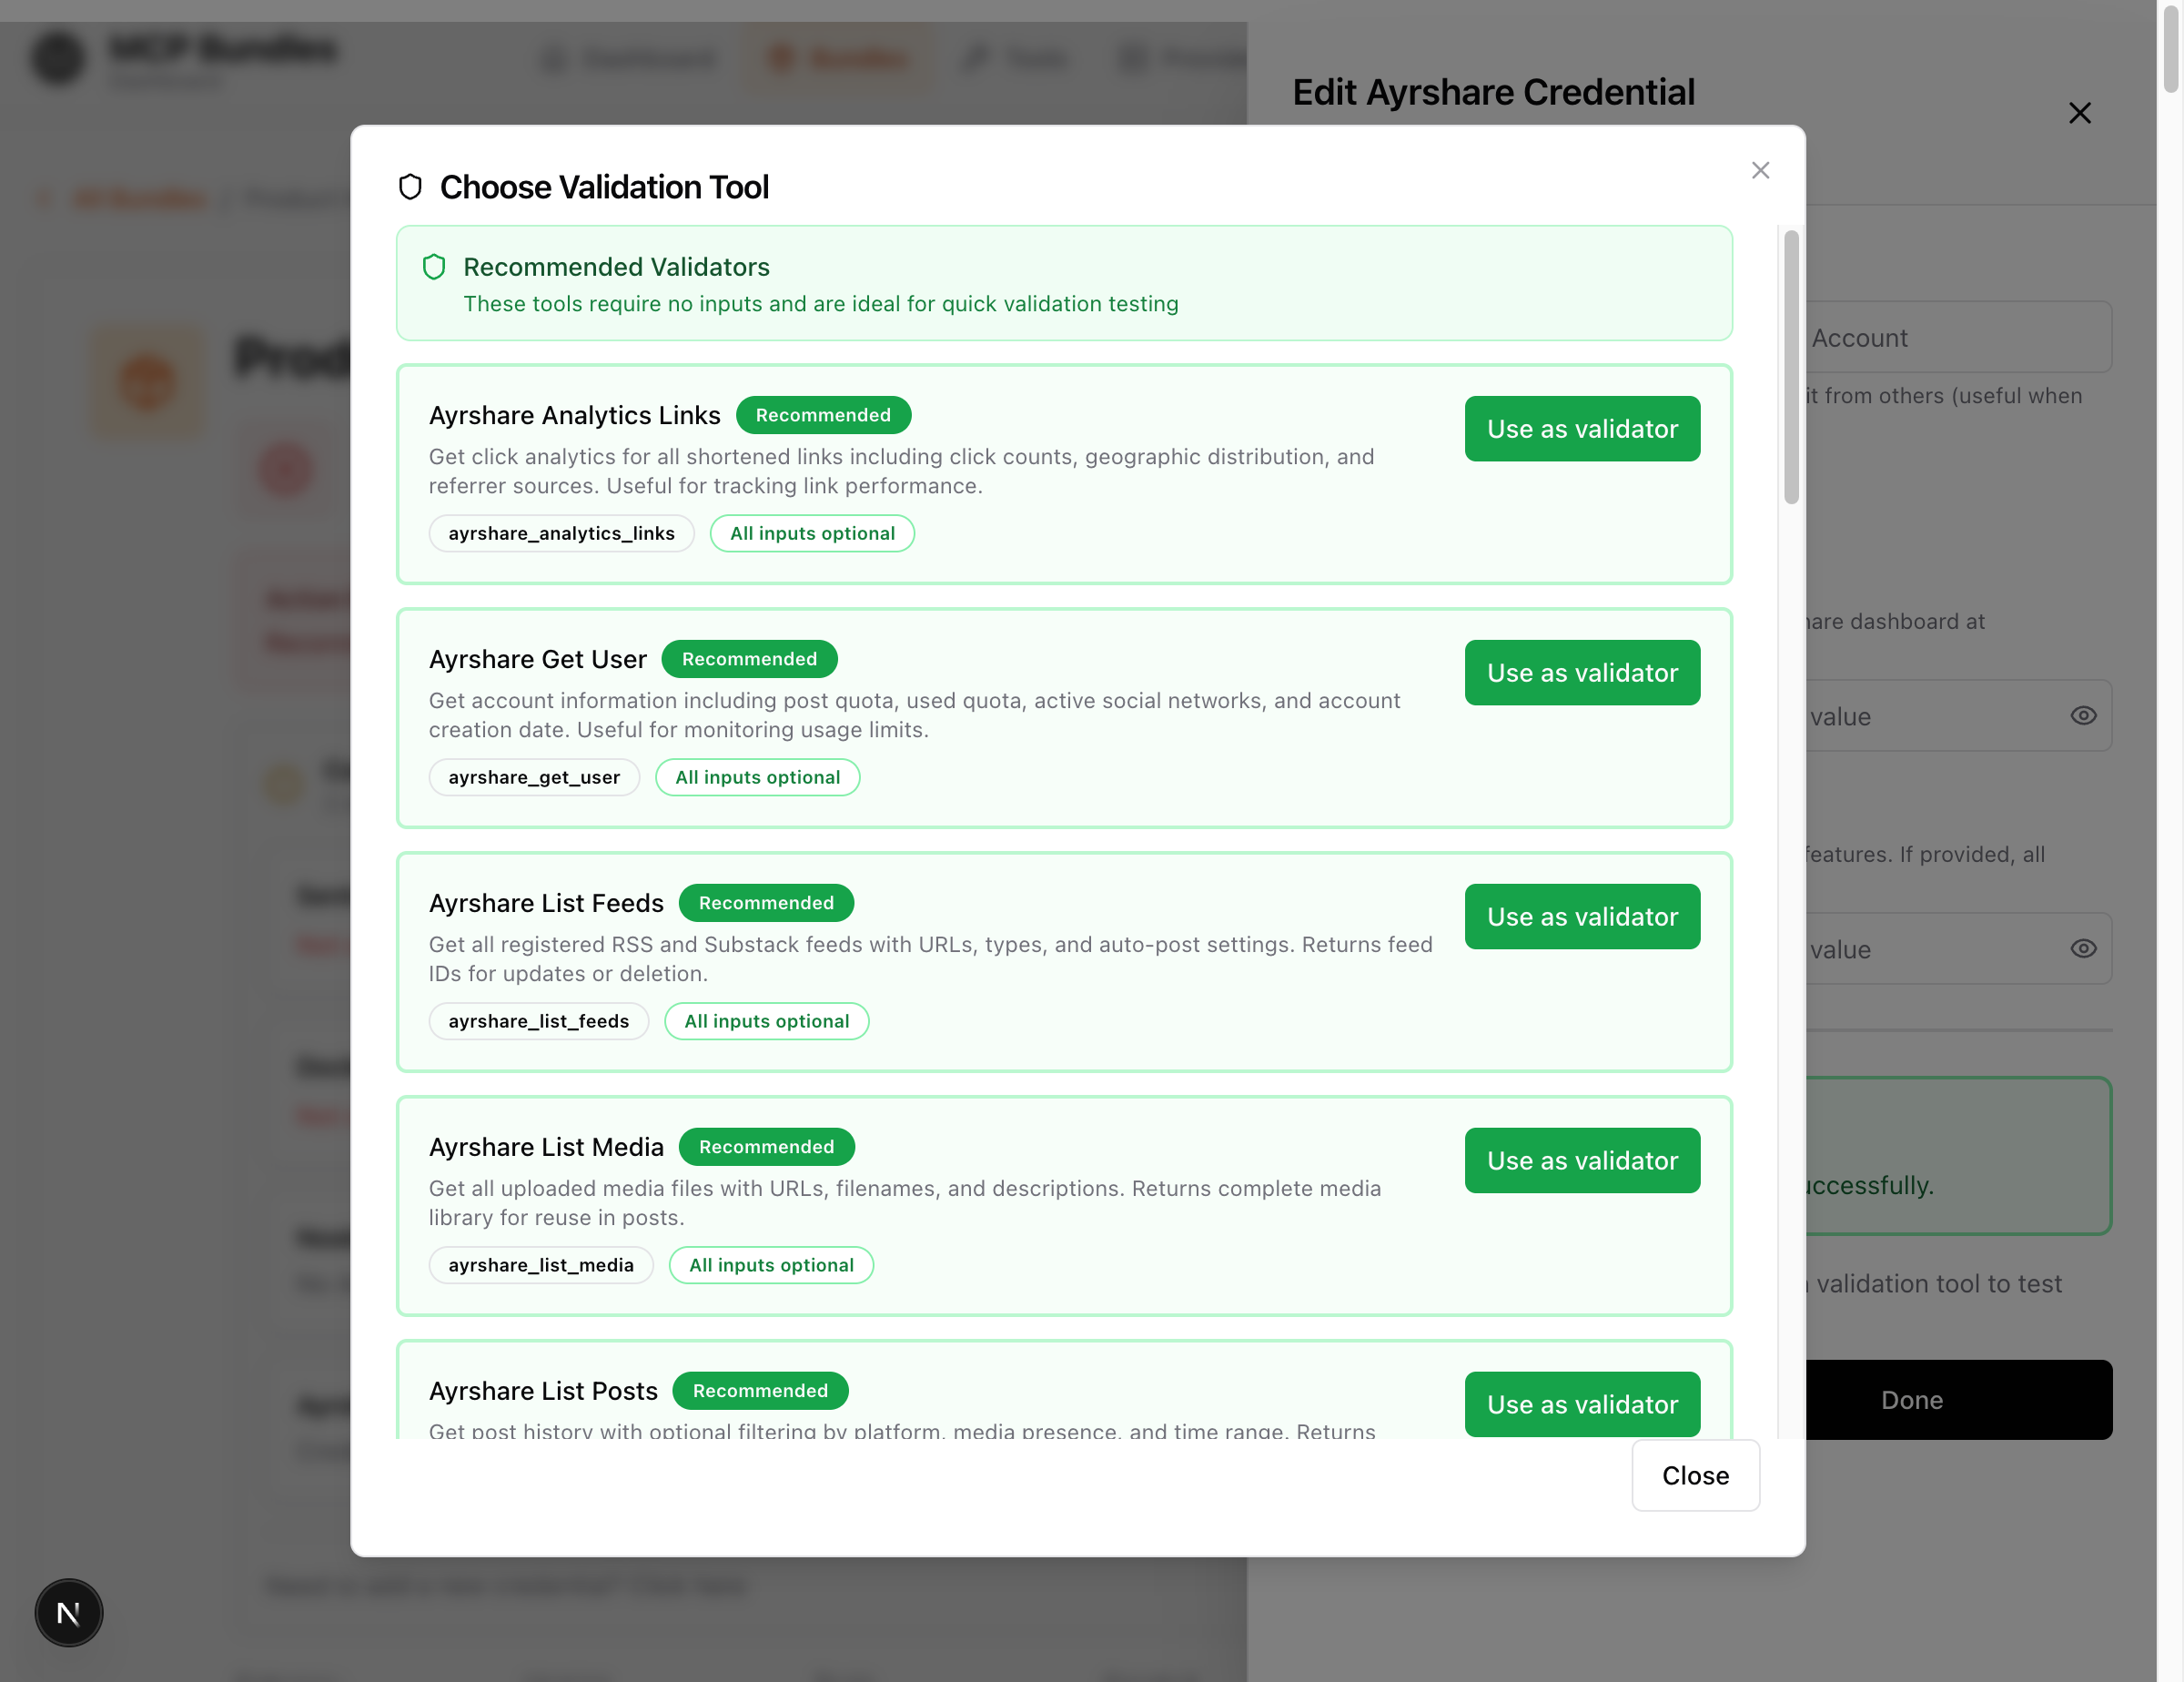
What is a validation tool? A simple, read-only tool that tests your credentials by making a real API call.
Pick a tool marked "Recommended" - these:
- ✅ Require no inputs
- ✅ Are safe (read-only operations)
- ✅ Work quickly
Good examples:
get_user- Gets account infolist_campaigns- Lists your dataanalytics_links- Gets analytics
- Click "Use as validator" on a recommended tool
- The picker closes
- You'll see the "Validate Now" button appear
Validate Your Credentials
After selecting a validation tool:
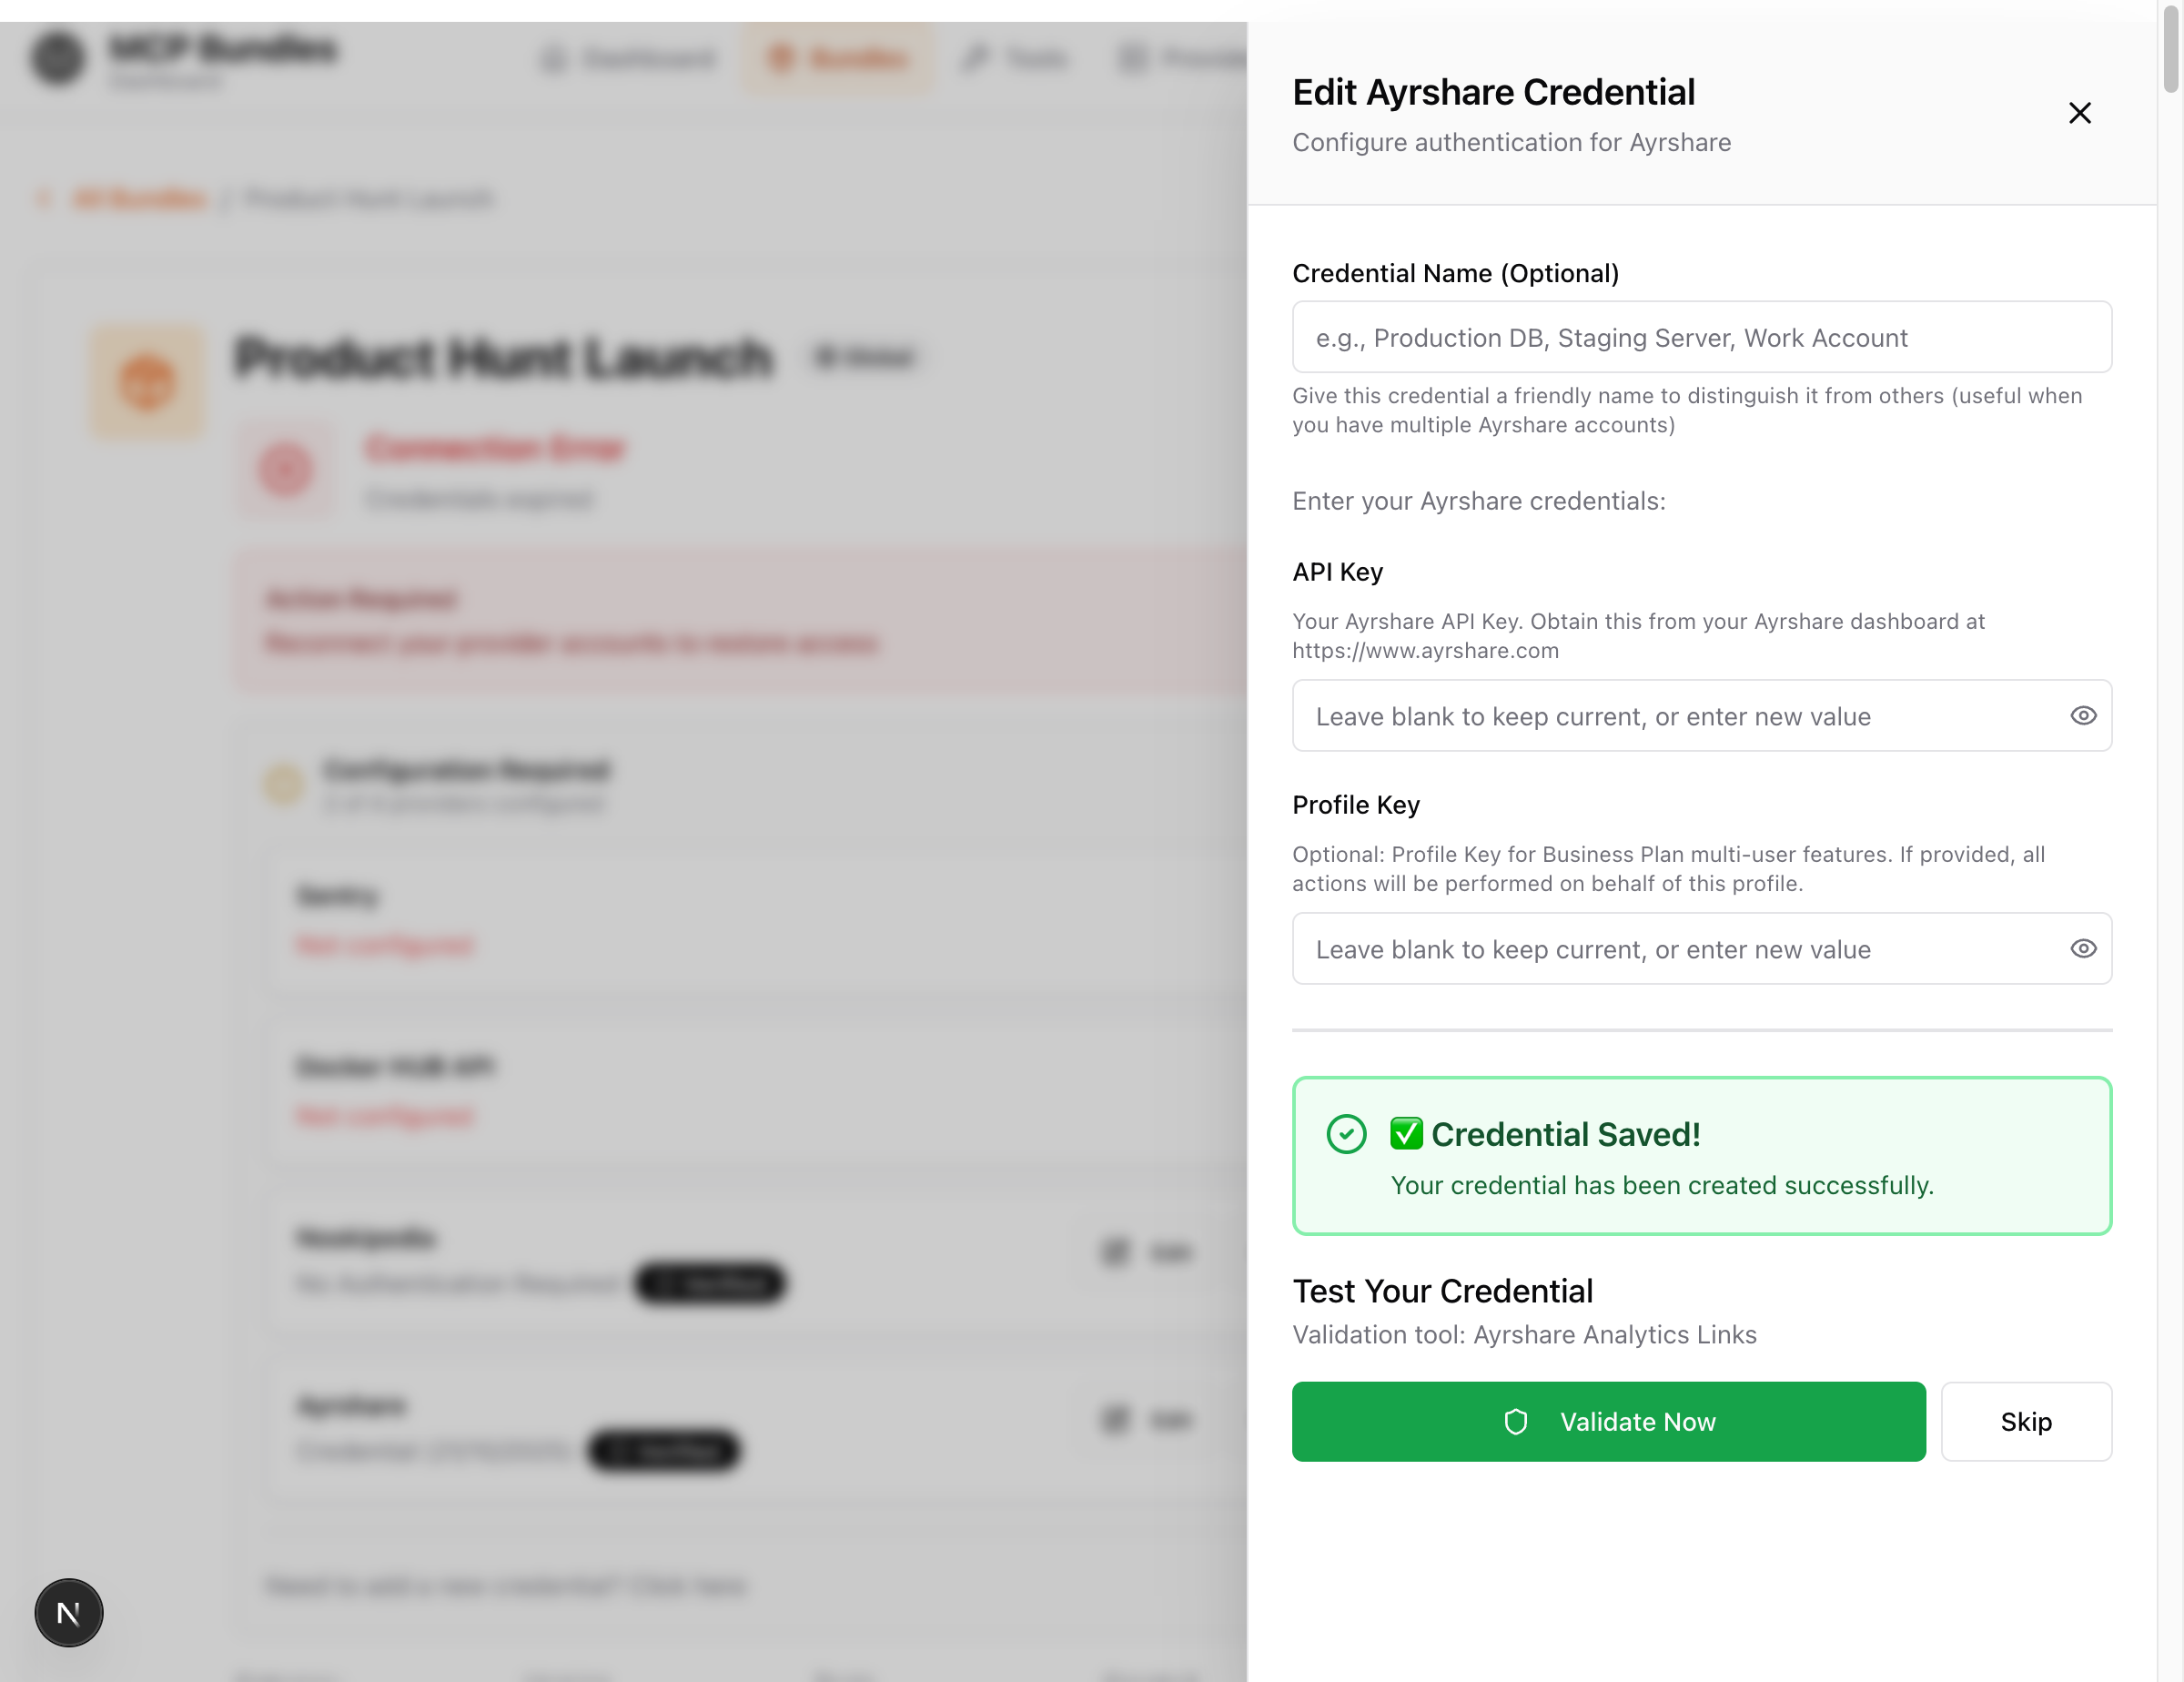
- Click the large green "Validate Now" button
- Wait 1-3 seconds while the tool tests your credentials
- Watch for the result:
- ✅ Success: Status changes to "VERIFIED" ✓
- ❌ Failed: Error message explains what went wrong
If validation succeeds: Your credential is ready! The panel will close and your bundle page updates.
If validation fails:
- Check your API key is correct (no extra spaces)
- For OAuth: Try reconnecting and approve ALL permissions
- See Troubleshooting for common issues
Confirm Bundle is Ready
After adding credentials, check your bundle page:
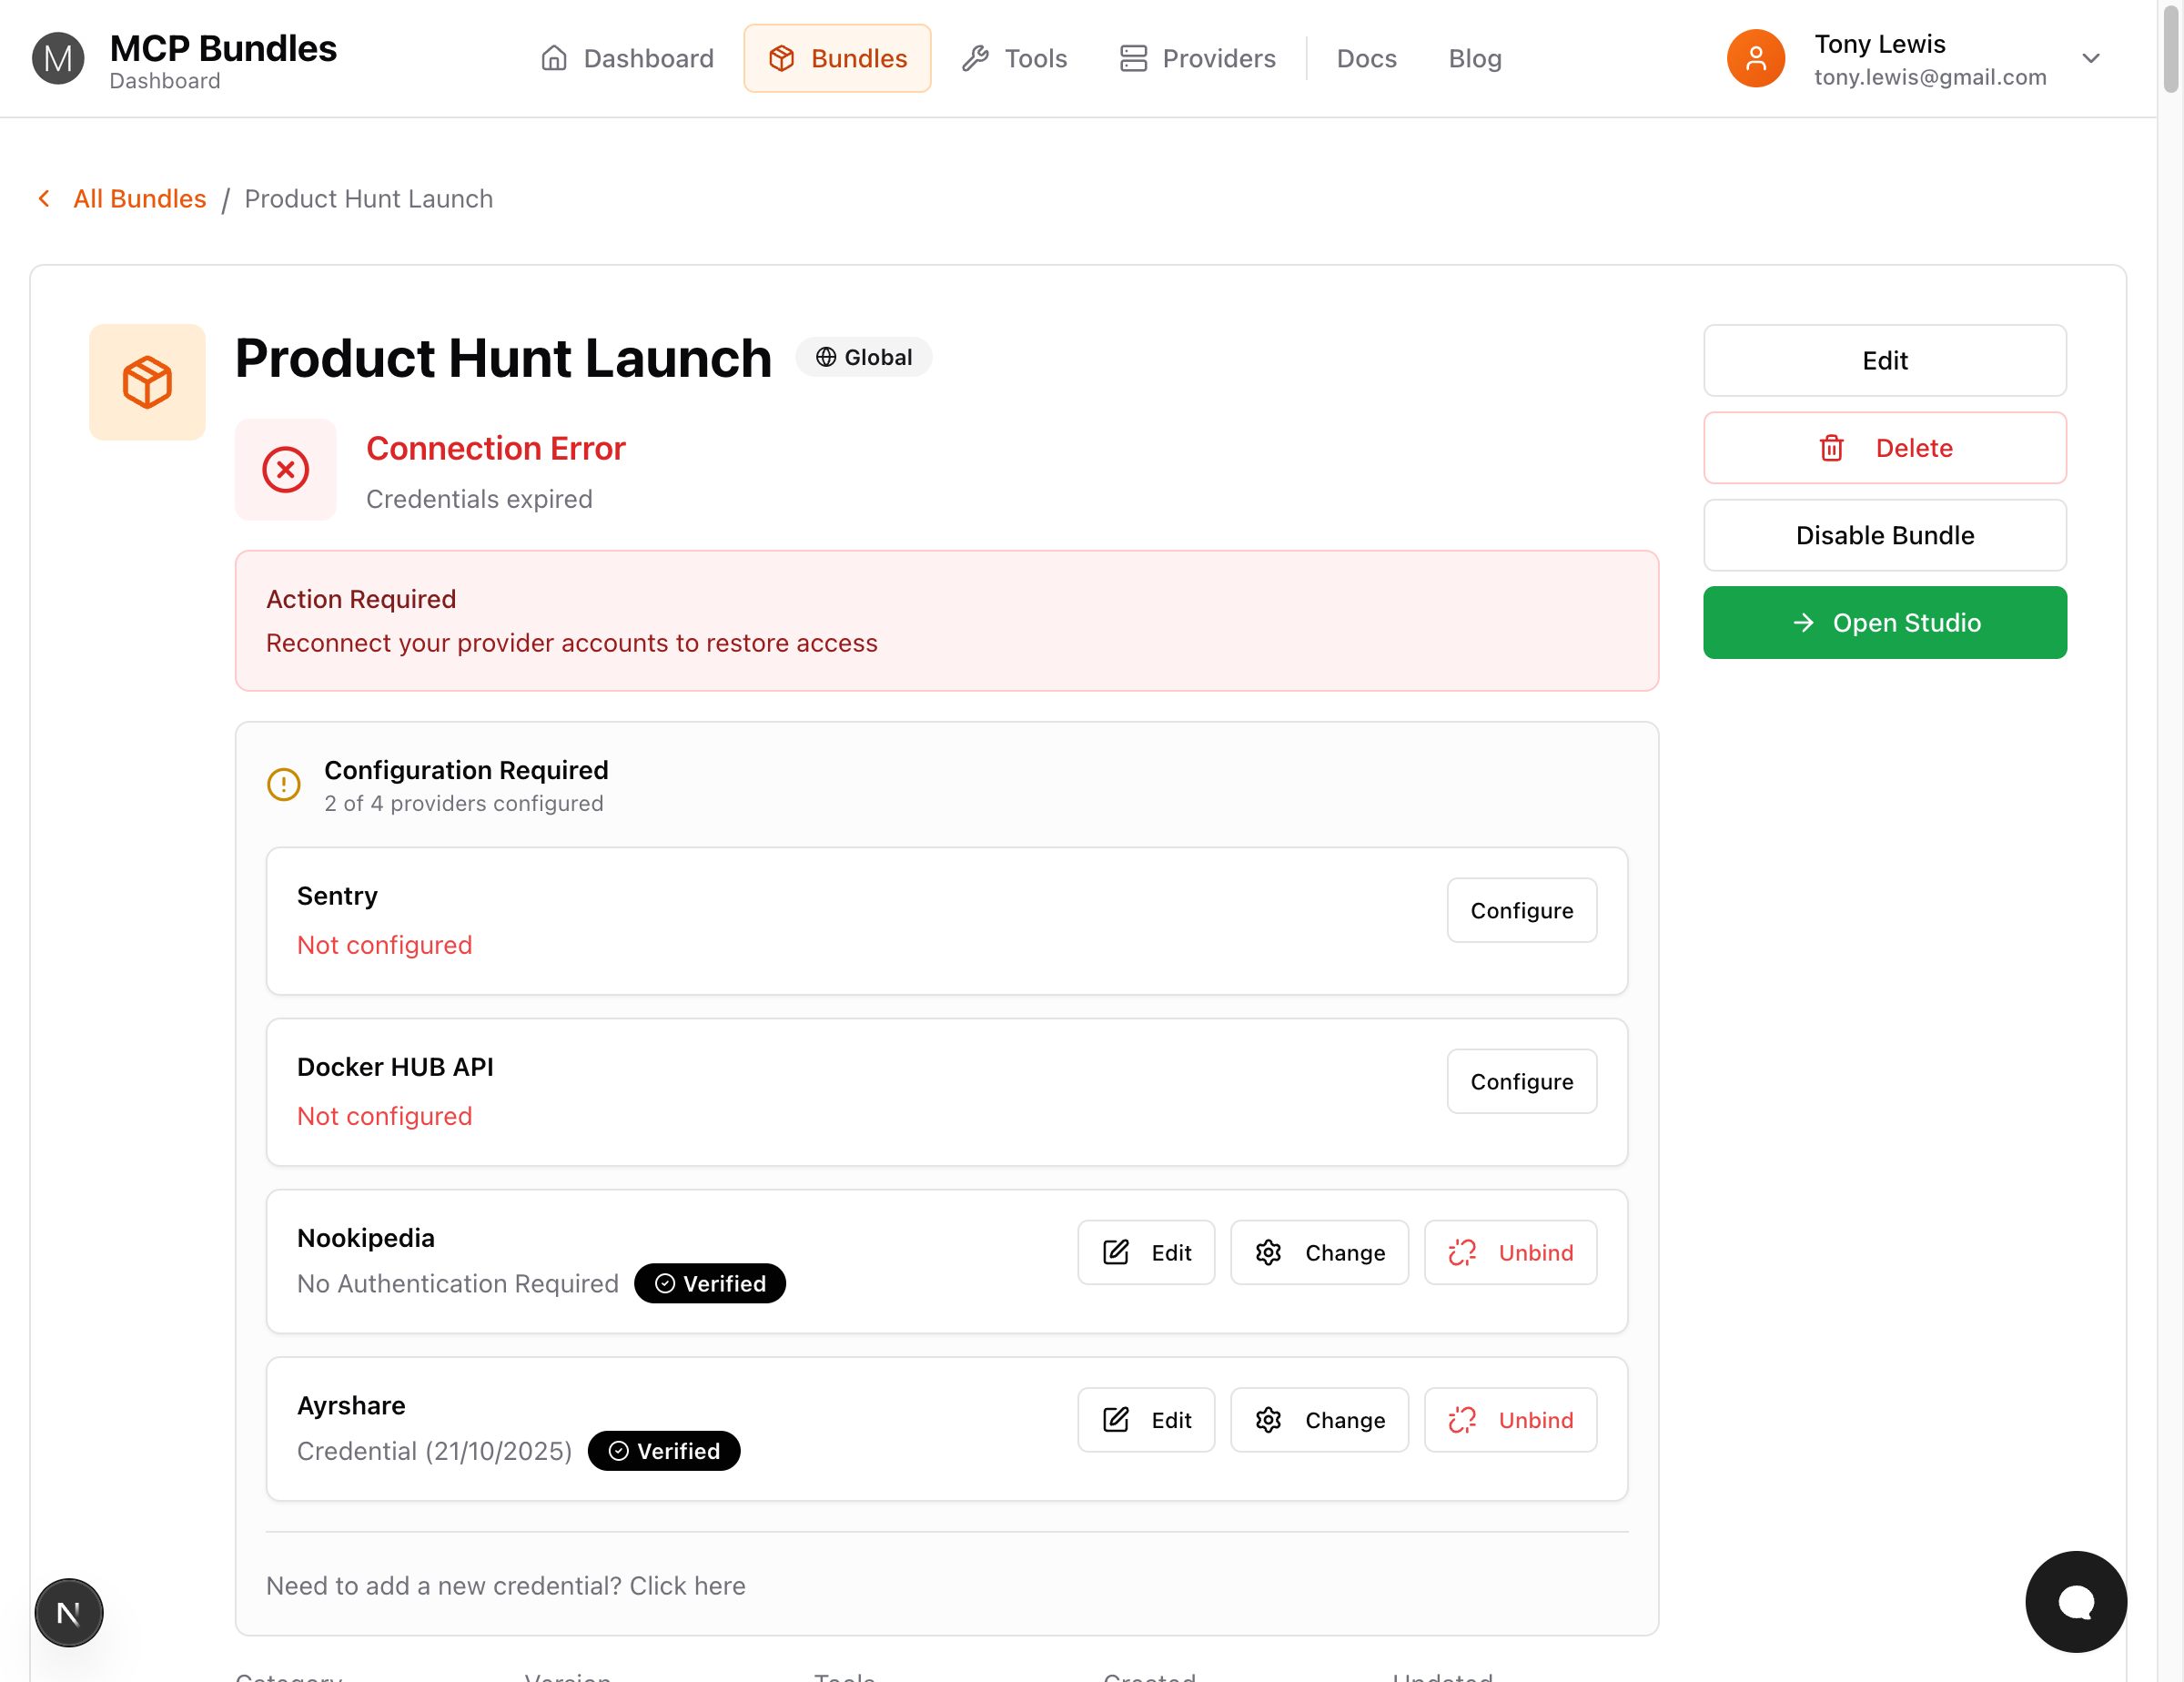
- "Connection Error" = Some providers still need credentials
- "Configuration Required" = Shows how many providers are configured
- All providers showing "Verified" = ✅ Ready to use!
When all required providers show "Verified", your bundle is ready!
Step 3: Add Bundle to Your AI
Before proceeding: Make sure your bundle shows "Ready - Credentials valid" status. If it's still showing "Setup Required" or "Connection Error", go back to Step 2 and verify any remaining providers.
Get Your Bundle URL
- On your bundle page, confirm status is "Ready - Credentials valid" ✅
- Find the MCP URL section
- It looks like:
https://mcp.mcpbundles.com/bundle/your-bundle-slug - Click "Copy MCP URL"
Add to Your AI Tool
Choose your AI platform:
ChatGPT:
- Settings → Apps → Advanced settings
- Click "Create app"
- Enable Developer Mode (toggle in Developer mode section)
- Fill out the form:
- Name: Your bundle name
- MCP Server URL: Paste your bundle URL
- Authentication: Select OAuth
- Check "I understand and want to continue"
- Click "Connect"
Cursor:
- Open
.cursor/mcp.jsonin your project - Add:
{
  "mcpServers": {
    "your-bundle-name": {
      "url": "https://mcp.mcpbundles.com/bundle/your-bundle-slug"
    }
  }
} - Restart Cursor
Claude Desktop:
- Open Claude Desktop
- Settings → Custom Connectors
- Click "Add Connector"
- Paste your bundle URL
- Save
Claude Code (CLI):
claude mcp add --transport http my-bundle https://mcp.mcpbundles.com/bundle/your-bundle-slug
claude  # Start session
/mcp    # Authenticate tools
Other platforms: See Integration Guides for VS Code, Raycast, Windsurf, and more.
Step 4: Test Your Tools
Let's confirm everything works by calling a tool from your AI.
Before testing in your AI, you can use Bundle Studio—an interactive tool testing environment right in your dashboard. Great for debugging or learning what a tool does before using it in production.
In Your AI:
- Open a new conversation
- Ask your AI to list available tools:
What MCP tools do you have available? - Your AI should show tools from your bundle
- Try calling one:
Use the list_campaigns tool to show my email campaigns - Tool executes and returns results!
If Tools Don't Appear
Check these in order:
- Bundle readiness shows "Ready - Credentials valid" (most common issue)
- If "Setup Required" or "Connection Error": Go back to Step 2 and verify remaining providers
- All required providers show "VERIFIED" (green checkmark, not yellow "UNVERIFIED")
- If any show yellow: Click into provider and complete validation
- Bundle is enabled on your account
- Check dashboard to confirm bundle is added
- You restarted your AI client after adding the URL
- Close and reopen ChatGPT/Cursor/Claude
- You're using the correct MCP URL
- Should include
/bundle/your-bundle-slug
- Should include
Still stuck? See Troubleshooting for common issues.
What's Next?
Now that you have a working bundle, explore more:
Learn the Concepts
- How MCPBundles Works - Understand the full architecture
- Understanding Bundles - Categories, publication, readiness
- Understanding Providers - OAuth, API keys, verification
Expand Your Setup
- Understanding Bundles - Bundle categories, states, and workflows
- Understanding Providers - Credential types and verification
- Browse more bundles by category in your Dashboard
Get Help
- FAQ - Common questions
- Troubleshooting - Fix common issues
- Glossary - Look up terms
Real-World Examples
Once you're set up, explore what you can build:
Marketing Automation:
- "Check my Smartlead campaigns and create a performance report"
- "Add these 5 contacts to HubSpot with their info"
- "Send a Slack message to #marketing with today's metrics"
Developer Productivity:
- "List my GitHub repos and summarize open PRs"
- "Get the latest API schema and generate TypeScript types"
- "Check build status and notify me if it fails"
Need Help?
- Email: help@mcpbundles.com
- Docs: Browse the sidebar for detailed guides
- Community: Coming soon
Congratulations! You're now using MCP bundles to extend your AI with real-world capabilities.